If you’ve been bottling homebrew and you’re tired of sanitising 50 bottles, capping them individually, and waiting a fortnight for carbonation — kegging will change your brewing life. If you’re still getting started, our home brewing for beginners guide walks through the basics first. It’s faster, more consistent, and once you’re set up, noticeably less hassle than bottling.
The initial investment is higher than a capping tool and a crate of bottles, but most homebrewers who switch to kegging say they wished they’d done it sooner. Here’s everything you need to know to get started.
Why Keg Instead of Bottle?
The practical advantages are significant:
- Speed — from fermenter to pouring in 24-48 hours instead of 2-3 weeks with bottle conditioning
- Consistency — force carbonation gives you exact control over fizz levels. No more flat bottles mixed with gushers
- Less cleaning — one keg to sanitise versus 40-50 bottles per batch
- Less oxygen exposure — closed transfers from fermenter to keg minimise oxidation, which means fresher-tasting beer
- Adjustable carbonation — don’t like how fizzy it is? Turn the pressure up or down. Try doing that with a bottle
- No sediment — force-carbonated beer doesn’t have the yeast sediment that bottle-conditioned beer leaves at the bottom
The trade-off? You need some equipment, a fridge or kegerator, and CO2 gas. But the running costs are surprisingly low once you’re set up.
The Essential Equipment
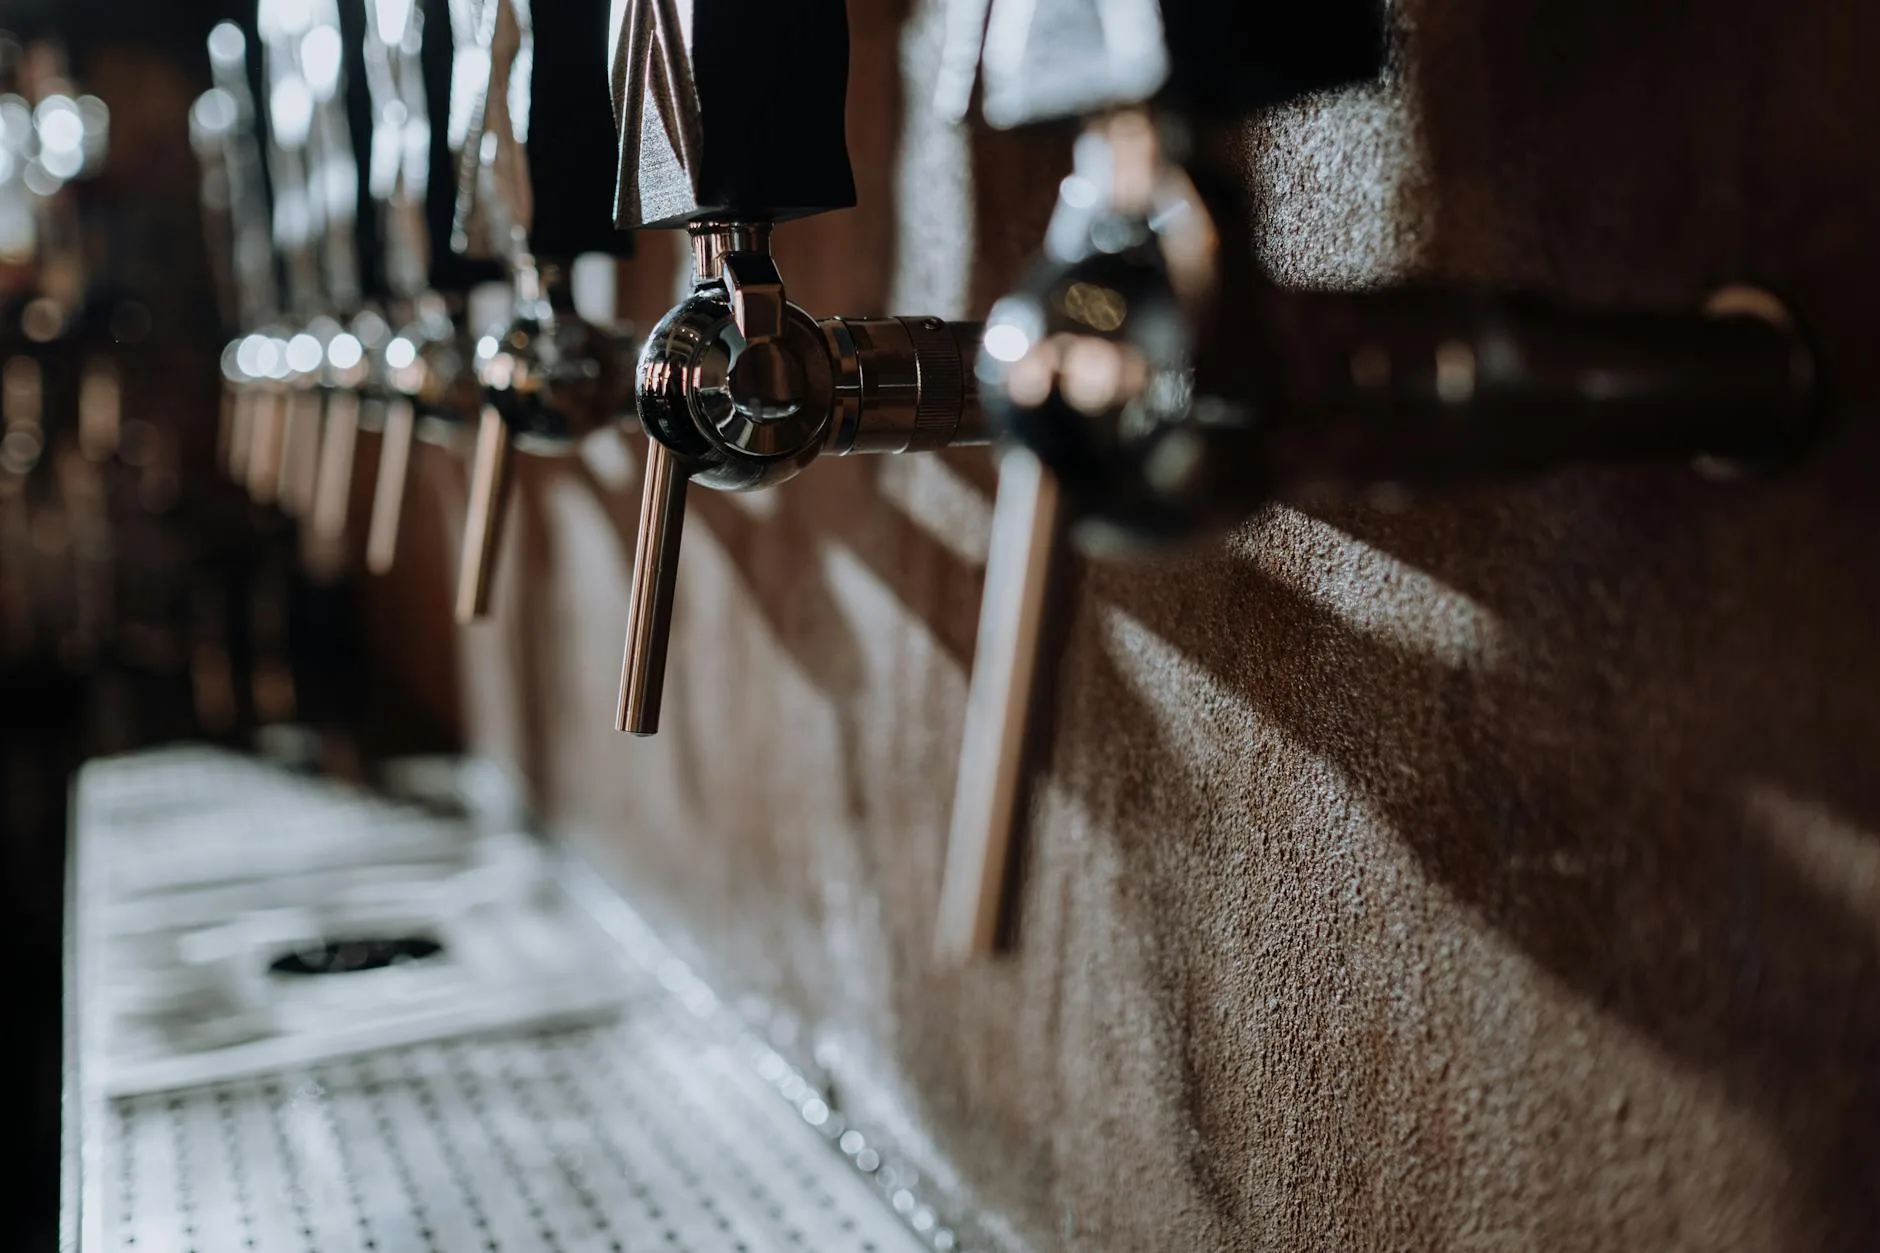
Corny Kegs (Cornelius Kegs)
These are the backbone of homebrewing kegging in the UK. Originally used by Coca-Cola and Pepsi for their syrup delivery, decommissioned Corny kegs have become the standard for homebrew.
Two types exist: – Ball lock — the more common type in the UK. Connectors use ball-bearing catches. Slightly easier to find and cheaper – Pin lock — uses pin-based connectors. Slightly larger diameter. Less common in the UK but still available
For a standard 19-litre (5-gallon) batch, one Corny keg is perfect. Most homebrewers eventually accumulate 2-4 kegs so they can have multiple beers on tap and always have an empty keg ready for the next brew.
Expect to pay: – Reconditioned Corny keg: £40-60 from UK homebrew shops – New Corny keg: £70-100 – Budget tip: buy in pairs — many UK suppliers offer discounts on two or more
Where to buy in the UK: – The Malt Miller (themaltmiller.co.uk) – Geterbrewed (geterbrewed.com) – BrewUK (brewuk.co.uk) – The Home Brew Shop (the-home-brew-shop.co.uk)
CO2 Cylinder and Regulator
You need compressed CO2 to push beer out of the keg and to force-carbonate it. A 2.6kg (6.6lb) cylinder is the sweet spot for most homebrewers — it’ll carbonate and dispense roughly 6-8 full kegs before needing a refill.
The regulator attaches to the CO2 cylinder and lets you control the pressure. A basic single-gauge regulator shows output pressure only. A dual-gauge model also shows how much CO2 remains in the cylinder — worth the small extra cost.
Expect to pay: – 2.6kg CO2 cylinder: £50-70 (plus £15-25 for refills at your local pub gas supplier or Homebrew shops) – Single-gauge regulator: £25-40 – Dual-gauge regulator: £35-55
Refilling CO2: Most homebrew shops can exchange cylinders. Alternatively, pub gas suppliers like BOC or local welding suppliers refill CO2 cylinders cheaply. Some fire extinguisher service companies do it too.
Disconnects and Beer Line
Ball lock disconnects clip onto the keg posts — you need one grey (gas IN) and one black (beer OUT). They connect to the CO2 regulator and your tap via food-grade tubing.
Beer line is the narrow tubing that runs from keg to tap. The internal diameter matters — 3/16″ (4.7mm) ID is standard for homebrew. Too wide and the beer pours too fast and foamy. Too short and you get the same problem.
Ideal beer line length: 1.5-2.5 metres of 3/16″ ID line balances the CO2 pressure and gives you a smooth, controlled pour. You’ll fine-tune this based on your setup.
Expect to pay: – Pair of ball lock disconnects: £8-15 – 3/16″ beer line (per metre): £1-2 – Gas line (per metre): £1-2 – Jubilee clips/clamps: £2-5 for a pack
A Way to Keep It Cold
Beer needs to be cold — both for carbonation (CO2 dissolves better in cold liquid) and for serving. You have three main options:
Option 1: Converted fridge (cheapest) Buy a second-hand fridge from Gumtree, Facebook Marketplace, or a local appliance recycler for £30-80. Most standard-size fridges fit one or two Corny kegs with the shelves removed. Drill a hole in the door for a tap shank, or just open the door to pour.
Option 2: Chest freezer kegerator A chest freezer with a temperature controller (like an Inkbird ITC-308, around £25-30) makes an excellent kegerator. They’re well-insulated, cheap to run, and can fit 3-4 kegs. Add a wooden collar on top for tap shanks. For a related angle, see our Fruit Wine Flavour Profiles: What to Expect guide.
Option 3: Purpose-built kegerator Ready-made kegerators with built-in taps and temperature control cost £300-600+ in the UK. They look great but you’re paying a premium for convenience over a DIY solution.
Taps
Picnic taps are the cheapest option — a plastic valve on the end of your beer line. They work fine and cost about £5-8. Most beginners start here. Cornelius kegs (also called Corny kegs) have been the homebrew standard for decades.
Intertap or Perlick taps are proper bar-style forward-sealing taps that mount through a fridge door or kegerator collar. They look great, pour well, and don’t stick like cheap taps. Expect £25-45 each plus a tap shank (£8-15).
The Total Startup Cost
Here’s a realistic UK budget for a basic single-keg setup:
- Reconditioned Corny keg: £50
- 2.6kg CO2 cylinder: £60
- Dual-gauge regulator: £45
- Ball lock disconnects (pair): £12
- Beer and gas line: £5
- Picnic tap: £6
- Fridge (second-hand): £50
- Total: approximately £228
You can trim this to under £180 by buying a basic regulator and hunting for deals on kegs. Or stretch to £400+ with a dual-tap setup, Intertap taps, and a proper collar build. Our How to Brew a Classic English Bitter at Home guide is useful alongside this.
Either way, you’ll recoup the investment in time saved within a few batches — and the quality improvement in your beer is immediate.
How to Force Carbonate

Force carbonation is the main reason most homebrewers switch to kegging. Instead of adding priming sugar and waiting 2-3 weeks, you push CO2 directly into cold beer under pressure.
The Set-and-Forget Method (Recommended for Beginners)
- Transfer your finished beer into a sanitised keg
- Seal the keg and purge the headspace with CO2 — connect the gas, set pressure to 30 PSI, pull the pressure relief valve 3-4 times to flush out oxygen
- Set your regulator to serving pressure (10-12 PSI for most ales at 3-4°C)
- Put the keg in the fridge
- Wait 7-10 days
The beer carbonates slowly and evenly. It’s not as fast as the “shake method” but it’s foolproof and produces the most consistent results. Check it after a week — if it’s not fizzy enough, leave it another few days.
The Burst Carbonation Method (Faster)
- Transfer beer to sanitised keg, seal and purge as above
- Set regulator to 30 PSI
- Leave for 24-36 hours in the fridge
- Drop pressure to serving pressure (10-12 PSI)
- Wait another 24 hours to equilibrate
Ready in 2-3 days. The higher initial pressure forces CO2 into solution faster. The risk is slight over-carbonation if you leave it at 30 PSI too long — but it’s easy to fix by pulling the pressure relief valve to release excess gas. We cover a similar decision in How to Create Your Own Beer Recipe from Scratch.
The Shake Method (Fastest, Riskiest)
- Transfer, seal, purge as above
- Set regulator to 30 PSI
- Disconnect the gas, lay the keg on its side, and shake vigorously for 5-10 minutes
- Reconnect gas at 30 PSI, shake for another 2-3 minutes
- Put in fridge, set to serving pressure
Can be ready in 24 hours. But it’s easy to over-carbonate, and the results are less consistent. Most experienced kegging brewers don’t bother with this method — the burst method is fast enough with better results.
Carbonation Levels by Style
Different beer styles want different carbonation levels, measured in “volumes of CO2”:
- Cask ale / real ale: 1.5-2.0 volumes (low fizz, natural feel) — set 5-8 PSI
- Standard bitter / pale ale: 2.0-2.4 volumes — set 8-12 PSI
- IPA / lager: 2.4-2.8 volumes — set 12-14 PSI
- Belgian styles / wheat beer: 2.8-3.5 volumes — set 14-18 PSI
- Stout on nitro: different system entirely (nitrogen + CO2 mix)
Temperature affects carbonation — colder beer absorbs CO2 more readily. Most carbonation charts assume 3-4°C fridge temperature.
Closed Transfers: Keeping Oxygen Out
One of kegging’s biggest quality advantages is the ability to transfer beer from fermenter to keg without exposing it to oxygen. Oxidation is the enemy of hop flavour and beer freshness.
Basic Closed Transfer
- Sanitise your keg and fill it with CO2 (purge several times at 5 PSI)
- Attach a liquid-out disconnect to a length of tubing
- Run the tubing from your fermenter’s spigot to the keg’s liquid post
- Open the fermenter’s spigot — gravity pushes beer into the CO2-filled keg
- The CO2 vents through the keg’s pressure relief valve as beer fills You may also want to read How to Make Hard Cider at Home.
Pressure Transfer
If you ferment under pressure (using a pressure-rated fermenter), you can use the fermentation CO2 to push beer directly into the keg. Zero oxygen exposure, zero effort. This is the gold standard for hoppy styles like NEIPAs where oxidation destroys the beer within days.
Cleaning and Maintenance
After Every Keg
- Rinse the keg with hot water immediately after emptying
- Fill with a cleaning solution — PBW (Powdered Brewery Wash) at 1 tablespoon per litre for 30 minutes
- Rinse thoroughly with hot water
- Before filling again, sanitise with Star San or similar no-rinse sanitiser
Periodic Maintenance
- Replace O-rings annually — the lid O-ring, post O-rings, and dip tube O-ring. A full O-ring kit costs about £3-5 per keg. Silicone O-rings last longer than standard rubber
- Disassemble posts every 3-4 batches and clean inside — beer residue builds up in the post channels
- Replace beer line every 6-12 months — even with cleaning, beer stone and bacteria can build up inside the tubing
- Check CO2 connections for leaks using soapy water sprayed on all fittings. A slow leak can empty your CO2 cylinder overnight
Keg Lube
Food-safe keg lube (silicone-based) on all O-rings makes sealing reliable and disassembly easier. A small tube lasts years and costs about £4-6.
Common Beginner Mistakes
- Beer line too short — causes foamy, spluttery pours. Add more line before anything else
- Serving pressure too high — 10-12 PSI is enough for most ales. Higher pressure means more foam
- Not purging oxygen — always flush the keg with CO2 before filling. Three purge cycles minimum
- Forgetting to check for leaks — a soapy water spray on every connection after setup saves wasted CO2
- Warm kegs — CO2 won’t stay in solution properly above 6-7°C. Get it cold before carbonating
- Impatience — the set-and-forget method takes 7-10 days. Resist the urge to check it every 24 hours
Serving Temperature and Carbonation by Style
Different beer styles taste best at different temperatures and carbonation levels. Getting this right can make the difference between a good pint and a great one. Here are the settings we use for the most common homebrew styles.
Lagers and pilsners: Serve at 3-5°C with higher carbonation (2.4-2.6 volumes of CO2). Set your regulator to about 12-14 PSI at fridge temperature. These styles benefit from being crisp and lively, so don’t be shy with the gas.
Pale ales and IPAs: Serve at 5-8°C with moderate carbonation (2.2-2.5 volumes). Around 10-12 PSI works well. Slightly warmer temperatures let the hop aromas come through more fully.
Stouts and porters: Serve at 8-12°C with lower carbonation (1.8-2.2 volumes). Drop the pressure to 6-8 PSI. These heavier styles benefit from a smoother, less fizzy pour that lets the roasted malt flavours develop on the palate.
Wheat beers: Serve at 4-7°C with higher carbonation (2.7-3.0 volumes). You’ll need about 14-16 PSI. The effervescence is part of the style and lifts the banana and clove esters that define a good wheat beer.
If you’re using a kegerator with a single regulator, you’ll need to compromise on pressure when serving multiple styles. A dual-regulator setup (about £30-40 from most UK homebrew suppliers) lets you set different pressures for each keg — well worth the investment if you regularly have two kegs on the go.
Where to Go from Here
Once you’ve got one keg working well, the natural progression is:
- Second keg — always have one conditioning while you drink the other
- Proper taps — upgrade from picnic taps to Intertaps or Perlicks
- Dual-body regulator — run two kegs at different pressures (useful for serving lager at higher carbonation alongside a cask-style bitter)
- Nitro setup — a nitrogen/CO2 blend for creamy stouts. Requires a stout tap and beer gas
- Keg collar build — a wooden frame on a chest freezer with drilled tap shanks. The classic homebrew kegerator
Kegging transforms homebrew from a hobby with tedious bottling days into something genuinely convenient. Brew on Saturday, keg on Friday, pouring perfect pints the following weekend. Once you’ve pulled your first glass of crystal-clear, perfectly carbonated homebrew from a tap in your own home, bottles feel like the dark ages.
Frequently Asked Questions
What homebrew kit should beginners buy first? Start with a fermenter, sanitiser, thermometer, hydrometer, syphon and bottles or a small keg setup. Keep the first brew simple.
What causes most beginner homebrew problems? Poor sanitation, unstable fermentation temperature and rushing bottling cause most faults. Clean process beats extra equipment.
Is all-grain brewing better than extract? All-grain gives more control, but extract is easier and still makes good beer. Beginners should choose the method they can repeat cleanly.
What should I check first with How to Keg Homebrew: A Beginner’s Guide? Start with the real use case, then check size, compatibility, running costs and maintenance. A product that looks good on paper can still be the wrong fit if it does not suit the room, routine or budget.
How do I avoid wasting money on How to Keg Homebrew: A Beginner’s Guide? Avoid buying on one headline feature alone. Compare the practical details, read the warranty or returns terms, and choose the option that solves your main problem rather than the one with the longest specification list.