Most homebrew mistakes are avoidable before brew day: dirty kit, rushed bottling, poor temperature control and guessing instead of measuring. If your first beer tastes thin, sour, fizzy in the wrong way or flat as pond water, the problem usually started long before you poured it. The good news is that home brewing is forgiving when you keep the process tidy and resist the urge to improvise too early.
In This Article
- The Homebrew Mistakes to Avoid First
- Start With the Right Kit and Recipe
- Clean First, Then Sanitise Properly
- Control Fermentation Temperature
- Measure Before You Guess
- Bottle Without Ruining the Beer
- Fix Problems Without Making Them Worse
- Frequently Asked Questions
The Homebrew Mistakes to Avoid First
The biggest homebrew mistakes are not obscure water chemistry problems or advanced recipe design errors. They are basic process failures repeated at the wrong time: touching cooled wort with unsanitised kit, fermenting too warm in a cupboard, bottling before fermentation has finished, and judging progress by bubbles alone.
That matters because homebrew is a chain. You can buy a decent 40-pint kit for £16-£28 from The Home Brew Shop or Brew2Bottle, use a £3.25 hydrometer, pitch a reliable yeast and still spoil the batch with one dirty syphon tube. Equally, you can spend £150 on shiny gear and produce worse beer than someone using a £29.95 starter setup if your process is loose. If you are still choosing your first setup, start with the basics in our home brewing for beginners guide before worrying about upgrades.
The boring errors are the expensive ones
The mistakes worth fixing first are the ones that affect the whole batch:
- Poor cleaning: dried yeast, beer stone or old residue protects bacteria from sanitiser.
- Weak temperature control: a room at 22°C can push the fermenting beer higher than that during the first active days.
- No gravity readings: airlock bubbles are a clue, not proof that fermentation is complete.
- Too much oxygen after fermentation: splashing during transfer can make beer taste stale and papery.
- Rushed conditioning: young beer often tastes sharp, green or over-sweet before it settles.
If you only change one thing, make it this: write down what you did. The best home brewers I know keep boring notes. Date brewed, yeast used, starting gravity, room temperature, final gravity, bottling sugar, tasting notes. A £2 notebook beats memory every time.
Start With the Right Kit and Recipe
Bad first batches often start with the wrong ambition. A beginner sees an all-grain stout video, buys half the equipment, skips half the control points and ends up blaming homebrew itself. Start simpler. A decent extract kit teaches sanitation, fermentation, gravity readings and bottling without making you manage mash temperature, sparging and boil-off on day one.
What to buy first
For a first beer, I would start with a 25-litre fermenting bucket, lid, airlock, syphon, bottling wand, hydrometer, trial jar, thermometer, cleaner, no-rinse sanitiser and either PET beer bottles or a pressure barrel. Brew2Bottle lists a beer/cider starter setup from about £47.95, while basic fermentation-only kits often sit around £26.95-£35. You can assemble your own basket, but starter bundles usually save a few pounds and stop you forgetting the dull bits.
The optional upgrade I would actually buy early is a bottling wand, usually £4-£7 from UK homebrew shops. It fills bottles from the bottom and cuts down splashing. The upgrade I would leave until later is a digital refractometer or Bluetooth hydrometer at £35-£80+. Nice toys, but they will not fix poor cleaning or hot fermentation.
Pick a forgiving beer
Choose a style that hides small beginner errors. A pale ale, bitter or amber ale kit is kinder than a delicate lager. Lager kits sold for room-temperature brewing can be fine, but true lager-style fermentation wants colder control and patience. A one-can 40-pint kit at £15-£20 plus brewing sugar is cheap, but a two-can premium kit around £24-£32 usually gives better body because you are not relying on a kilo of plain sugar to bulk it out. Our home brewing starter kit picks cover the kit-bundle side if you want a shortlist rather than building a basket from scratch.
Based on UK user reviews and my own brewing notes, the sweet spot for a first batch is a mid-range ale kit, a fresh sachet of yeast, and a brew day where you do not rush. Keep the recipe dull. Dull is good here. You are learning process, not trying to clone a hazy DIPA with three dry-hop additions in a warm airing cupboard.
Check freshness before brew day
Old extract darkens and can taste tired. Yeast stored hot or past its date may start slowly. If the kit came from the back of a cupboard, check the best-before date and buy fresh yeast if needed. A sachet of SafAle US-05, Nottingham or S-04 is usually £2.75-£4.50 in the UK, and that is cheap insurance compared with dumping 23 litres of beer.
The first homebrew mistakes avoid list should include buying ingredients before checking where they will ferment. If your only space is a sunny utility room that swings from 16°C overnight to 25°C by late afternoon, solve that before choosing the recipe.
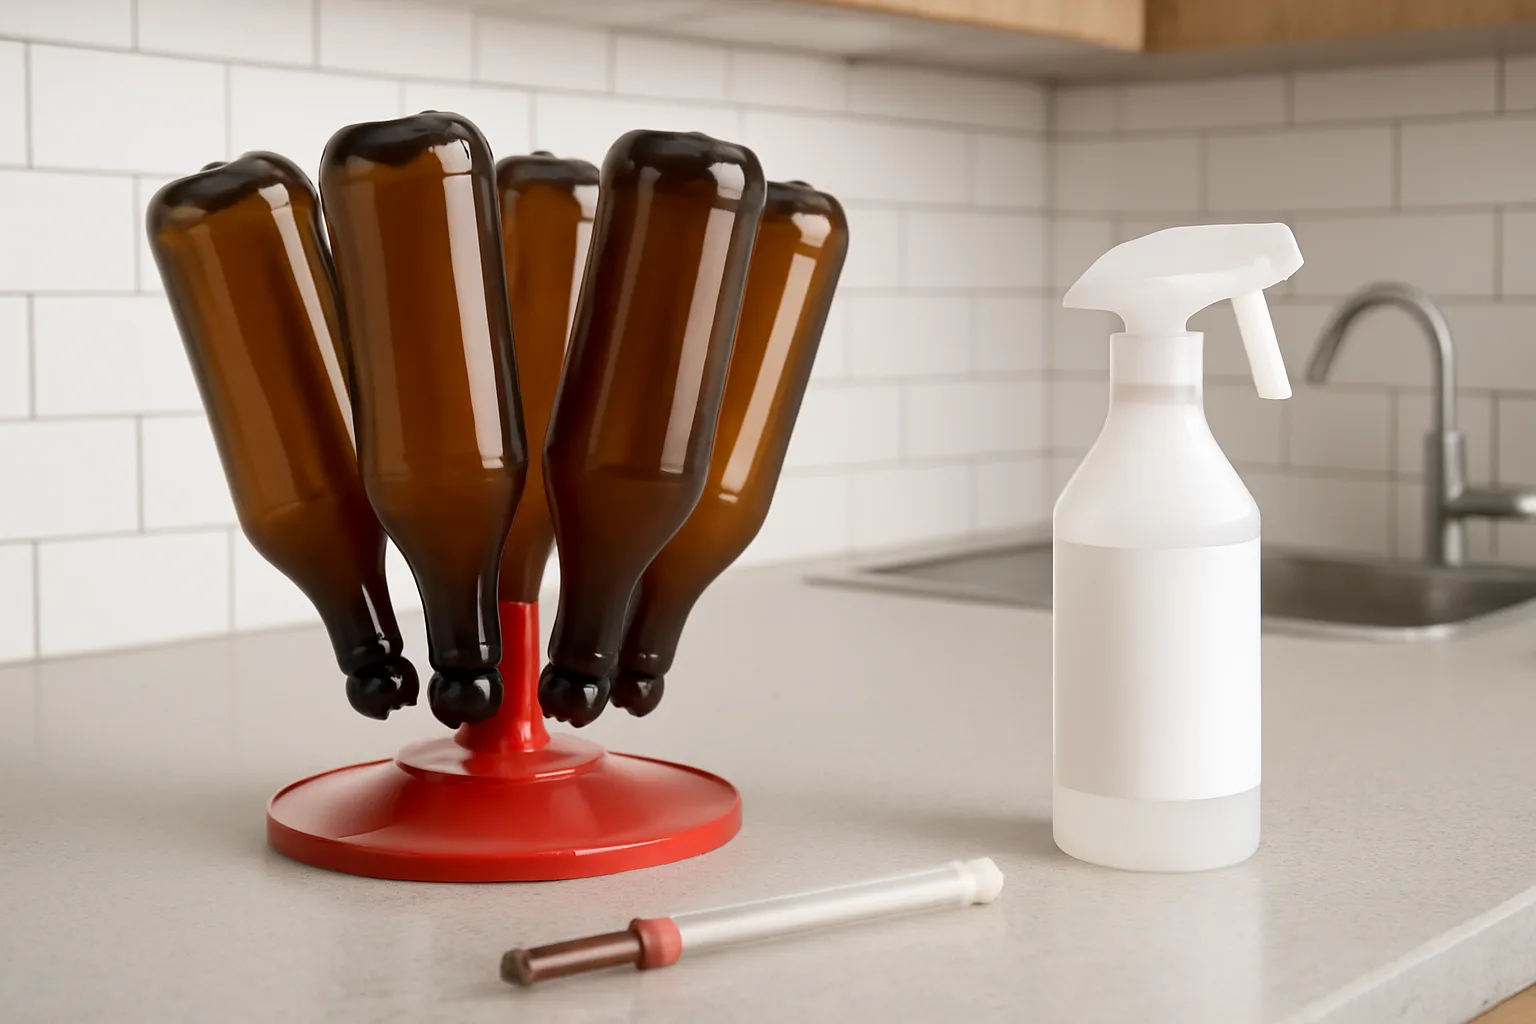
Clean First, Then Sanitise Properly
Cleaning and sanitising are not the same thing. Cleaning removes visible dirt, dried malt, yeast crust and bottle grime. Sanitising reduces the microbes left on already-clean surfaces. Sanitiser is not magic foam that eats old beer residue.
The correct order
Use a cleaner first, then sanitiser. For most beginner kit, that means warm water, a soft cloth or non-scratch sponge, and a brewing cleaner such as Chemclean or sodium percarbonate. Avoid anything abrasive inside plastic fermenters because scratches become hiding places for grime. If a bucket smells sour after washing, do not trust it with cooled wort.
For sanitising, no-rinse acid sanitisers are convenient. Brew2Bottle currently lists ChemSan No Rinse Sanitiser 500ml at £11.95, used at 10ml to 5 litres with a two-minute wet contact time according to its product instructions. That 500ml bottle lasts ages for home use, especially if you keep a spray bottle mixed for brew-day contact points. For a deeper pass on this stage, use our cleaning and sanitising homebrew equipment guide alongside the product label.
What actually needs sanitising
Anything touching cooled wort or fermented beer needs sanitising:
- Fermenter and lid: including the rim, tap, grommet and airlock.
- Spoons and paddles: especially if stirred after the wort has cooled.
- Hydrometer and trial jar: never dip a dirty hydrometer into the main batch.
- Syphon tube and bottling wand: these are common infection points.
- Bottles, caps and barrel seals: clean first, then sanitise close to filling time.
The usual beginner slip is cleaning bottles the day before, leaving them exposed, then assuming they are still ready. They might be, but why risk it? Sanitise close to use and drain them upside down. Do not rinse no-rinse sanitiser unless the label says your dilution requires it.
The smell test is not enough
Infected beer does not always smell awful on day one. Sometimes it ferments normally, then turns sharp, medicinal or over-carbonated in the bottle. If you have repeated sour batches, replace cheap plastic parts first: syphon tube, bottling wand, taps and scratched buckets. A new syphon tube at £3-£6 is cheaper than chasing a hidden infection through five batches. If the flavour problem is already in the glass, compare it with the fault descriptions in our beer off-flavours guide before blaming the recipe.

Control Fermentation Temperature
Fermentation temperature has more influence than beginners expect. Yeast does not just turn sugar into alcohol; it produces flavour compounds while it works. Too hot and you can get solvent notes, harsh fruitiness or fusel heat. Too cold and fermentation may drag, stall or leave the beer sweet.
Muntons notes in its homebrew FAQ that low temperature fermentation can cause sluggish starts, and poor aeration can also slow yeast growth. That matches what I see in beginner batches: people worry after 24 hours, open the lid, stir with something dubious, then create a bigger problem than the slow start.
Aim for stable, not perfect
Most ale kits are happiest somewhere around 18-21°C for the beer itself, unless the instructions say otherwise. The beer can run a couple of degrees warmer than the room during the busiest part of fermentation, so a cupboard at 22°C is not always harmless. In a UK heatwave, a fermenter in a water bath with a towel over it can shave the peak down enough to save the batch.
Useful temperature-control options:
- Stick-on thermometer strip: £2-£4, basic but better than guessing room temperature.
- Water bath: almost free if you already have a trug or storage box.
- Brew belt or heat pad: usually £18-£35, useful in cold garages but easy to overdo.
- Inkbird controller and fridge: around £35-£45 for the controller, plus a used fridge if you have space.
My preference for UK homes is simple: find the coolest stable room first, then add heat only if the beer is too cold. Heating a fermenter is easier than cooling one in July.
Do not keep opening the lid
Airlock bubbles are satisfying. They are also a terrible reason to keep poking the beer. Every lid opening increases oxygen and infection risk. If you need to check progress, sanitise the tap or thief, take a sample, measure gravity and leave the main batch alone.
If fermentation starts slowly, wait 36-48 hours unless there is a clear problem such as no yeast pitched, very cold wort or a leaking fermenter lid. A lid leak can stop airlock bubbles while fermentation is working fine. That is why gravity readings matter more than bubbles.
Measure Before You Guess
Guessing causes two common failures: bottling too soon and misjudging ABV. A hydrometer is not optional kit. It costs about £3.25 from Brew2Bottle, with a plastic trial jar around £1.75-£2.95. Buy both and learn to use them.
Gravity readings prevent bottle bombs
Take an original gravity reading before pitching yeast, then take final gravity readings near the end. If the reading is stable over two days and close to the recipe expectation, fermentation is probably done. If it is still dropping, wait. Bottling active beer traps extra fermentation in the bottle, which can mean over-carbonated beer, leaking caps or, in glass bottles, dangerous pressure. The step-by-step method in our hydrometer guide is worth following until reading the scale feels automatic.
Do not return the sample to the fermenter. Drink it, taste it, or pour it away. It has been exposed to air and whatever touched the trial jar.
Keep a useful brewing log
A good log does not need to be fancy. Record:
- Kit and yeast: brand, style, batch size and yeast date.
- Temperatures: wort temperature at pitching and room range during fermentation.
- Gravity: original gravity, final gravity and dates taken.
- Timing: brew day, dry hop date if used, bottling date and first tasting date.
- Faults: sulphur, green apple, sourness, harsh bitterness, flatness or gushing.
This is where many homebrew mistakes stop repeating themselves. If your beer tasted solvent-like and your notes say the fermenter sat at 24°C for three days, you have a lead. If your bottles gush and your final gravity was never checked, you know what to fix next time.
Taste samples without panicking
Young beer can taste odd. Warm, flat beer from the trial jar is not the finished pint. Look for warning signs, not perfection: vinegar sharpness, strong medicinal notes, ropey texture, mould, or an intense sour smell where none should exist. Cloudiness alone is not a disaster. Many kit beers clear with time, colder storage and careful pouring.
Bottle Without Ruining the Beer
Bottling is where a good first beer often gets damaged. The beer has finished its main work, so now you are trying to move it gently, add the right priming sugar, seal it cleanly and let it condition. The goal is not speed. The goal is a clean transfer with minimal splashing. If your bottling setup is still just a syphon and hope, the options in our homebrew bottling equipment guide are more useful than buying another recipe kit.
Choose bottles that suit the job
For beginners, PET beer bottles are underrated. A pack of 24 x 500ml PET bottles is often £12-£18, they are lighter than glass, and you can squeeze them to feel carbonation build. Brown glass bottles look better, but only reuse bottles designed to hold pressure. Do not use screw-top wine bottles for beer.
Pressure barrels are convenient for English bitters and lower-carbonation ales. A basic 10-litre barrel may come in a starter kit; larger 25-litre economy barrels are often £30-£40. They are less ideal for highly carbonated styles and can leak around seals if neglected. If you hate cleaning 40 bottles, a barrel is tempting, but I still prefer bottles for a first batch because faults are easier to isolate.
Prime carefully
Muntons troubleshooting guidance says under-carbonation can come from forgotten or insufficient priming sugar, poor seals, low secondary temperature or sterilising solution left in bottles. Its troubleshooting page gives a traditional guide of half a level teaspoon per bottle or 80g for a barrel, though modern batch priming with weighed sugar is more consistent.
For 23 litres of many ales, 100-140g of brewing sugar is a normal range, depending on style and desired carbonation. Use an online priming calculator if you want tighter control, but do not blindly dump in extra sugar because the last batch was flat. Flat beer may have been too cold during conditioning, bottled too early, poorly sealed or left too young.
Avoid oxygen while transferring
Keep the syphon outlet below the beer surface in the bottling bucket. Use a bottling wand. Do not splash from height. Do not stir aggressively after fermentation. Oxygen at this stage can make beer taste dull, stale and cardboard-like after a few weeks.
Condition bottles warm for about 10-14 days, then move them cooler. In a cold garage in January, carbonation may take longer. If using PET bottles, firmness is a useful clue, but still chill one bottle before judging. Warm beer foams more and tastes rougher.
Fix Problems Without Making Them Worse
The worst fix is usually the panicked one. Beginner beer goes through ugly phases: foamy krausen, sulphur smells, cloudy samples, yeast rafts and odd trial-jar flavours. Most of those need patience, not intervention.
When to leave it alone
Leave the beer alone if fermentation is active, the temperature is reasonable and there is no obvious infection. Do not rack it early just because it looks messy. Do not add random sugar because bubbles slowed. Do not open the lid daily to sniff it. Beer does not improve because you stare at it.
If the gravity is still high after a week, warm the fermenter slightly and gently rouse by swirling the closed bucket. If it remains stuck, check the yeast, recipe and temperature notes before adding anything. Muntons flags low temperature and poor aeration as causes of slow starts, so those are better first checks than blaming the kit.
When to act
Act when the evidence points to a real fault:
- Stable high gravity: warm gently, rouse the yeast, and consider fresh yeast only if needed.
- Gushing bottles: chill immediately, open carefully outdoors, and review final gravity and priming.
- Sour repeat batches: replace plastic transfer parts and deep-clean taps, threads and seals.
- Harsh solvent flavour: review fermentation temperature before changing recipes.
- Flat bottles: check storage temperature, cap seals and priming amount before adding more sugar next time.
The beer you dump should teach you something. If you cannot name the likely cause, you are guessing. Take notes, change one variable next brew, and keep the process boring. Boring process makes better beer than heroic rescue attempts.
The practical bottom line
If I were setting up a new brewer with £80-£100, I would spend it on a sensible starter kit, ChemSan or similar no-rinse sanitiser, a spare yeast sachet, a hydrometer and PET bottles. I would not spend it on fancy hops, oak chips, pressure-transfer gear or a recipe that needs temperature control you do not have.
Common homebrew mistakes and how to avoid them comes down to discipline rather than cleverness: clean properly, sanitise properly, ferment at a stable temperature, measure gravity, bottle gently and wait longer than you want to. Do that and your first few beers will not be perfect, but they will be drinkable. That is the right target.
Frequently Asked Questions
What is the most common homebrew mistake? Poor cleaning and sanitising is the one that ruins whole batches fastest. Temperature and rushed bottling are close behind, but dirty kit can spoil beer before fermentation even starts.
Can I brew beer at home legally in the UK? Brewing beer at home for your own use is normal in the UK, but selling alcohol is a different matter and needs proper licensing, duty and business compliance. Treat homebrew as personal consumption unless you have taken formal advice.
How much does it cost to avoid beginner homebrew mistakes? Around £60-£100 is enough for a sensible first setup if you buy a starter kit, sanitiser, hydrometer, trial jar and bottles. Spending more helps only once your process is tidy.
Should I use glass or PET bottles for first homebrew? PET bottles are easier for beginners because they are cheap, light and let you feel carbonation pressure. Glass looks better, but it must be pressure-safe and spotless.
How do I know when homebrew is ready to bottle? Use a hydrometer. If the gravity is stable over two days and close to the recipe’s expected final gravity, it is usually ready. Airlock bubbles alone are not reliable.
Can bad homebrew be saved? Sometimes. Flat beer, slow fermentation and mild haze can often be fixed or improved with time. Strong sourness, mould, ropey texture or repeated gushing usually points to a process fault that needs fixing in the next batch.