You’ve done your first kit brew — probably a Cooper’s or Muntons can that came with everything included — and it turned out drinkable. Maybe even good. Now you want to understand what actually went into it, and how to make better choices next time. The difference between a mediocre homebrew and something you’re proud to pour for mates isn’t technique (though that matters). It’s ingredients. The malt, hops, yeast, and water you choose determine 90% of what ends up in your glass, and understanding each one is the single biggest step you can take as a brewer.
This isn’t about becoming a chemistry nerd or memorising hop alpha acid percentages. It’s about understanding what each ingredient does so you can make deliberate choices — and fix things when they go wrong.
Malt: The Foundation of Every Beer
Malt provides the sugars that yeast ferments into alcohol, but that’s only half the story. It also provides colour, body, flavour, head retention, and mouthfeel. Choosing the right malt is choosing the character of your beer.
Base Malts
These make up 80-100% of your grain bill and provide the bulk of fermentable sugars. You need to pick one as your foundation:
- Pale Malt (Maris Otter) — the quintessential British base malt. Biscuity, slightly sweet, with a depth of flavour that American pale malts can’t match. If you’re brewing British styles — bitters, pale ales, porters — this is your malt. Available from every UK homebrew supplier at about £1.50-2.00 per kg. Maris Otter is the default for good reason.
- Pilsner Malt — lighter, cleaner, and crisper than pale malt. The base for lagers, pilsners, Belgian styles, and any beer where you want the hops or yeast to be the star. Needs a longer mash (90 minutes rather than 60) to convert properly. About £1.50-2.00 per kg.
- Wheat Malt — used at 40-70% for wheat beers (hefeweizens, witbiers). Gives a fluffy, protein-rich head and a hazy, silky body. Almost always mixed with barley malt because wheat has no husk and can clog your mash.
- Munich Malt — darker and maltier than pale, with toasty, bread-crust flavours. Can be used as 100% of the base for Märzens and dark lagers, or at 10-20% to add malt complexity to any beer.
- Vienna Malt — between pale and Munich in colour and flavour. Slightly toasty and biscuity. Great as a base for amber ales and Vienna lagers.
For your first few all-grain brews, stick with Maris Otter as your base malt. It’s forgiving, flavourful, and works in virtually every British beer style. You can’t go wrong with it.
Specialty Malts
These are used in small quantities (typically 5-15% of the total grain bill) to add colour, flavour, and complexity. Think of them as seasoning.
- Crystal/Caramel Malts — the most common specialty. Available in a range of colours from Light Crystal (10-20 EBC) to Dark Crystal (150+ EBC). Lighter crystals add honey and caramel sweetness. Darker crystals add toffee, raisin, and dried fruit. Use 5-10% for a subtle sweetness, up to 15% for a pronounced caramel character. Too much crystal malt is the most common beginner mistake — it makes beer cloying and overly sweet.
- Chocolate Malt — dark brown to black, adding deep chocolate and coffee flavours. Essential for porters and stouts. Use at 3-7% — a little goes a long way.
- Roasted Barley — unmalted barley roasted until nearly black. The signature ingredient of dry stouts like Guinness. Gives a sharp, coffee-bitter, roasty character. Use at 5-10% for stouts.
- Biscuit/Victory Malt — adds toasty, bread-crust, cracker-like flavours without adding sweetness. Lovely in English bitters and brown ales at 5-10%.
- Smoked Malt (Rauchmalz) — wood-smoked malt for Rauchbiers and smoked porters. Use sparingly (10-30%) unless you want your beer to taste like a campfire. Which is actually brilliant if you’re into that.
The golden rule with specialty malts: start low. You can always add more next time. An overbearing crystal malt sweetness or an aggressive roast character can’t be fixed after the mash.
Malt Extract vs Grain
If you’re not yet doing all-grain brewing, malt extract is your shortcut. It’s essentially concentrated wort — the liquid produced by mashing grain — that you dissolve in water and ferment.
- Liquid Malt Extract (LME) — thick, syrupy, and a bit messy to work with. Comes in Light, Amber, and Dark varieties. Goes stale faster than dried extract, so check the date.
- Dry Malt Extract (DME) — powder form, easier to measure and store. More consistent batch to batch. More expensive per kg but less wasteful.
- Specialist extracts — Muntons, Coopers, and others produce style-specific extracts (Wheat, Lager, Stout) that include specialty malt character. Convenient but less flexible than building your own grain bill.
Extract brewing is a perfectly valid approach — plenty of award-winning homebrews have been made with extract. The key is freshness: old extract oxidises and produces a distinctive “extract twang” that experienced brewers can spot immediately. Buy from suppliers with high turnover (The Malt Miller, BrewUK, Geterbrewed) and use it within 6 months.
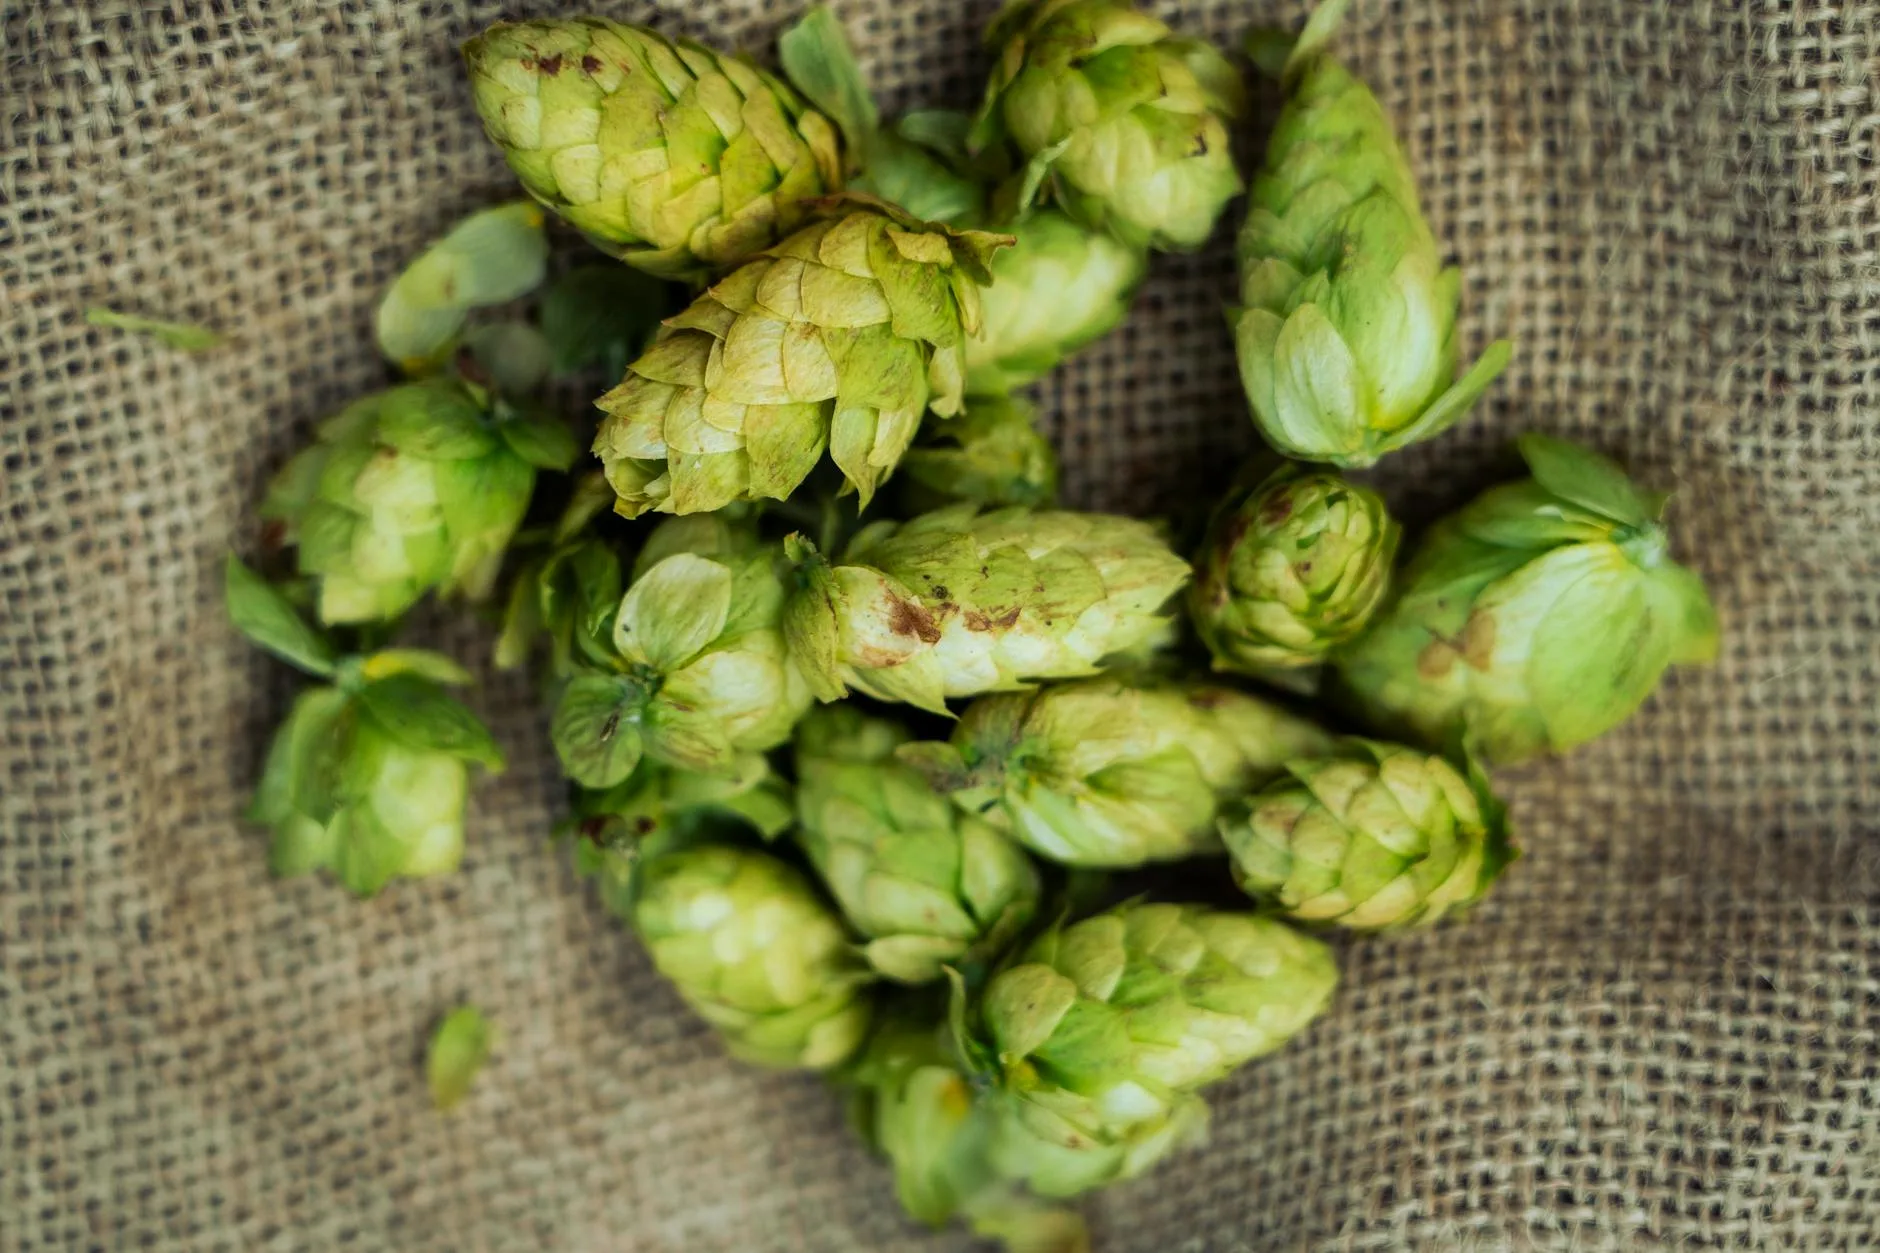
Hops: Bitterness, Flavour, and Aroma
Hops balance the sweetness of malt with bitterness, and add an enormous range of flavours and aromas — from floral and herbal to tropical and citrusy. How you use them matters as much as which ones you choose.
When You Add Hops Changes Everything
- Bittering hops (60 minutes) — added at the start of the boil. The long boil extracts alpha acids, which provide bitterness. The longer the boil, the more bitterness extracted. Most of the delicate flavour and aroma compounds evaporate during this time.
- Flavour hops (15-30 minutes) — added mid-boil. These contribute flavour without as much bitterness. You get the “character” of the hop — herbal, spicy, fruity — without the full bittering impact.
- Aroma hops (0-5 minutes / flameout) — added at the end of the boil or after turning off the heat. These preserve the volatile aromatic oils that give beer its hop nose. Most modern IPAs get their character from late additions.
- Dry hopping (fermentation) — adding hops directly to the fermenter after primary fermentation. Adds intense aroma without bitterness. The defining technique for New England IPAs and American pale ales. Use 2-5g per litre for moderate dry hopping, up to 10g per litre for hop bombs.
Popular UK-Available Hop Varieties
British hops have a distinct character — earthy, herbal, spicy, marmalade — that’s completely different from American or Australasian varieties. Here are the ones worth knowing:
British classics:
- Fuggle — earthy, woody, slightly minty. The backbone of traditional English bitters. Low alpha acid (3-5%), so you need a lot for bittering.
- East Kent Goldings (EKG) — floral, honey, gentle spice. The other classic English hop. Elegant in pale ales and golden ales.
- Challenger — clean bitterness with a cedar and green tea character. Excellent dual-purpose British hop.
American hops (widely available in the UK):
- Cascade — the gateway American hop. Floral, grapefruit, citrus. A good first hop for American-style pale ales.
- Citra — intense tropical fruit (mango, passionfruit, lychee). The dominant hop in modern IPAs. About £4-6 per 100g from UK suppliers.
- Mosaic — complex: blueberry, tropical fruit, pine, herbal. Beautiful as a single-hop beer.
- Simcoe — pine, passion fruit, with a distinctive earthy undertone. Great for West Coast IPAs.
New World hops:
- Nelson Sauvin (New Zealand) — white wine, gooseberry, sauvignon blanc character. Distinctive and polarising. People either love it or hate it.
- Galaxy (Australia) — passionfruit and peach. Works brilliantly in NEIPAs.
For British styles (bitters, milds, ESBs), stick with British hops. For American styles (IPAs, pale ales), use American or New World hops. Mixing traditions works too — a Maris Otter base with Citra dry hop makes a fantastic modern British pale ale.
How Much Bitterness?
Bitterness is measured in IBUs (International Bitterness Units). As a rough guide:
- Mild ales — 15-25 IBU
- Bitters and golden ales — 25-40 IBU
- Pale ales — 30-50 IBU
- IPAs — 40-70 IBU
- Double IPAs — 60-100+ IBU
Your recipe should specify a target IBU. If you’re adapting a recipe, use a brewing calculator (Brewfather, BeerSmith, or the free Brewer’s Friend online calculator) to hit your target. Alpha acid percentage varies between hop crops, so always check the packet and recalculate.
Yeast: The Most Underrated Ingredient
New brewers obsess over hops and mostly ignore yeast. Experienced brewers know that yeast makes the beer. The same wort fermented with different yeasts produces radically different beers — from clean, crisp lagers to fruity, estery Belgian ales.
Dry vs Liquid Yeast
- Dry yeast — cheaper (about £2-4 per packet), easier to store (fridge, not freezer), and requires no starter. Safale US-05, Safale S-04, and Nottingham are the three most popular dry yeasts in the UK, and between them they cover most styles. A packet of US-05 will clean-ferment almost anything reliably.
- Liquid yeast — more expensive (£6-9 per vial/pack from White Labs or Wyeast), shorter shelf life, and often needs a yeast starter for strong beers. But the range is vastly wider — you can get specific strains for every style, from London ESB yeast to Trappist abbey strains. This is where you graduate to when you want precision.
Choosing Yeast by Style
- Clean American/British ales — Safale US-05 (dry) or Wyeast 1056/White Labs WLP001. Ferments cleanly between 18-22°C. The Swiss army knife of brewing yeasts.
- English ales — Safale S-04 (dry) or Wyeast 1968 London ESB. Slightly fruity, leaves some residual sweetness, drops clear quickly. Perfect for bitters and pale ales.
- Belgian ales — Safale BE-256 (dry) or Wyeast 3787 Trappist High Gravity. Produces the distinctive banana, clove, pepper, and stone fruit esters that define Belgian beer. Ferment warm (20-25°C) for more ester production.
- Lagers — Saflager W-34/70 (dry) or Wyeast 2124 Bohemian Lager. Ferment cool (10-14°C) for 2-4 weeks. Lager yeast is more demanding — you need temperature control, which usually means a fermentation fridge with a temperature controller.
- Wheat beers — Safale WB-06 (dry) or Wyeast 3068 Weihenstephan. The 3068 is legendary — it produces the banana and clove esters that define a classic Bavarian hefeweizen. Temperature is everything: lower temps (16-18°C) push clove, higher temps (20-24°C) push banana.
Yeast Health and Temperature
Two things ruin more homebrews than anything else: under-pitching and bad temperature control.
- Pitch enough yeast — one packet of dry yeast is usually enough for a standard 20-23 litre batch at moderate gravity (below 1.060 OG). For stronger beers, use two packets or make a starter.
- Control fermentation temperature — yeast produces off-flavours (fusel alcohols, acetaldehyde, excessive esters) when it’s too warm. Most ale yeasts work best at 18-20°C. If your house is warmer, ferment in the coolest room or use a wet towel wrapped around the fermenter.
- Don’t rush it — primary fermentation typically takes 5-10 days for ales. Let it finish completely (stable gravity readings two days apart) before bottling or kegging. Bottling too early causes over-carbonation and potentially exploding bottles.
Water: The Forgotten Ingredient
Water is 90-95% of your finished beer, yet most beginners don’t give it a thought. You can brew perfectly good beer with UK tap water straight from the tap — and many award-winning homebrewers do exactly that. But understanding water helps you make better beer.
UK tap water varies enormously by region:
- Soft water (low mineral content) — Scotland, Wales, Lake District, Pennines. Good for pilsners, lagers, and delicate pale ales.
- Hard water (high mineral content, especially calcium and magnesium) — London, Burton-upon-Trent, East Anglia. Good for bitters, IPAs, and stouts. The famous “Burton water” is extremely hard and sulphate-rich, which accentuates hop bitterness.
- Moderately hard — most of England falls here.
For your first several brews, don’t worry about water chemistry. Use tap water (ideally run through a carbon filter jug to remove chlorine, which causes medicinal off-flavours) and focus on malt, hops, and yeast. When you’re ready to refine, get a water chemistry report from your water supplier (usually available free on their website) and use brewing software to calculate any adjustments.
The one water adjustment worth making from day one: remove chlorine. Either use a carbon filter, add half a Campden tablet (sodium metabisulphite) to your brewing water, or fill a container the night before and let it stand uncovered — chlorine evaporates within 24 hours.
Where to Buy Ingredients in the UK
The UK homebrew scene is well-served by specialist suppliers. These are the most reliable:
- The Malt Miller (online) — probably the best UK homebrew ingredient supplier. Huge hop selection, fresh grain, fast delivery. Malt is milled to order.
- Geterbrewed (Belfast, online) — excellent range, particularly for yeast and specialty ingredients. Good prices on bulk hops.
- BrewUK (online) — thorough range, competitive pricing, reliable.
- The Home Brew Shop (Farnborough) — one of the longest-running UK homebrew shops. Good for beginners who want advice with their order.
- Brew2Bottle (Nottingham, online) — solid range, fair prices.
- Wilko — yes, Wilko. They stock basic Muntons kits, malt extract, and sanitiser at high street prices. Not the widest range, but convenient for impulse purchases and top-up supplies.
For bulk buying (which saves notably on grain), The Malt Miller and Geterbrewed offer whole sacks of base malt (25kg) at about £25-35. That’s enough for 4-5 standard brews and costs roughly £1 per kg versus £2+ for smaller quantities. You’ll need airtight storage, but a clean plastic dustbin with a tight lid works perfectly.
Frequently Asked Questions
What are the four main ingredients in beer? Water, malt, hops, and yeast. Water makes up 90-95% of the finished beer. Malt provides sugars for fermentation plus colour and body. Hops add bitterness, flavour, and aroma. Yeast converts sugars into alcohol and CO2, and contributes its own flavour character.
What is the best malt for homebrew beginners? Maris Otter pale malt is the best starting base malt for UK homebrewers. It’s versatile, flavourful, and works in virtually every British beer style. For extract brewers, a light dry malt extract (DME) from a reputable supplier is the safest starting point.
How much hops do I need per batch? A standard 20-23 litre batch typically uses 20-50g of bittering hops and 20-100g of aroma/dry hops, depending on style. A mild ale might use 30g total, while a heavily hopped IPA could use 200g or more. Follow your recipe and use a brewing calculator to hit your target IBU.
Does the type of yeast really matter? Enormously. The same wort fermented with a clean American ale yeast (like US-05) and a Belgian Trappist yeast will produce two completely different beers. Yeast determines ester profile, attenuation, mouthfeel, and clarity. It’s arguably the most important ingredient choice you make.
Can I reuse yeast from a previous brew? Yes — yeast harvesting is common among homebrewers. After fermentation, the yeast cake at the bottom of your fermenter can be washed and repitched into your next batch. Liquid yeast strains can be reused 5-8 times before genetic drift affects flavour. Use within 2 weeks for best results.